Request a Detail

Pro-Wash

Author: janine

I Have Foggy Headlights! What Do I Do?

Do you know what it’s like to drive with foggy headlights? They make it much harder to see in low-visibility conditions. They are also a risk to other motorists who are in the oncoming lane. Functioning headlights are a requirement for an inspection sticker in all states and have to pass a brightness test as well. Do you think your lights will pass? If not, it may be time to clear the fog from them with one of the remedies in this post.


What causes foggy headlights?

Before 1990 or so, most headlights were made of glass. The worst they were prone to were scratches. However, glass headlights were much easier to break. Manufacturers switched to polycarbonate plastic headlights because they were more durable and cheaper to make and replace. Unfortunately, the plastic lenses also degrade over time. They turn yellow and cloudy, restricting the light that they reflect.


How does the cure work?

The substances that we talk about below are all abrasive compounds. When you add the paste to a headlight with light pressure, the cloudiness is buffed out of the headlight. The same concept is used when you have cloudy paint on your car. Your detailer will use a buffer and a special compound to buff the paint until the cloudiness fades. However, an exterior buff will be followed with a wax. There is no need to wax your headlights.

How can I get rid of my foggy headlights?

As we mentioned before, the process is very simple and requires only a few tools. You’ll need the following before you begin:

  • Rags
  • A soft brush
  • An abrasive compound, such as toothpaste, baking soda (mixed with water to make a paste), or a headlight restoration kit
  • Water for rinsing

Foggy Headlights Made Bright

  1. Wash your foggy headlights with soap and water to make sure any remaining grit is off. You risk scratching your headlights if there’s grit on them.
  2. Put a generous amount of compound on your headlights. The amount will vary based on the size of your headlights, but use enough to coat your headlight. If you’re using baking soda, mix it with water to make a paste first.
  3. Using the soft brush, work the compound into the surface of your headlight in a smooth, circular motion for about 3 minutes.
  4. Wipe the compound from your headlights and rinse with water.

If this process doesn’t work, you may need to bring your car to a professional detailer for a more abrasive compound and buffing rather than using a soft brush.

Having fully functional headlights is very important. Foggy headlights reduce the amount of light directed in front of you and make it harder for oncoming traffic to judge your distance. Not sure you want to do the process yourself? Contact us today for a professional headlight restoration!
Ozone Treatments: A Saving Grace for Smelly Cars

What is that smell?” We’ve all heard it. That smell that could be who knows what coming from the vents of your car or under the seat or in the upholstery itself. You’ve tried cleaning and scrubbing, baking soda, everything you can think of, all of the tips in our post about cleaning your car’s interior. When all else fails, the next step is an ozone treatment. You may have heard of it. Ozone machines are the area of professional detailers. We’ll break it down for you here.


What is an ozone treatment?

Ozone treatment is the use of the gas ozone (O3) to remove odors, bacteria, and viruses. Your detailer will place an ozone generator in your vehicle for a designated amount of time, depending on the strength of the odor. As the gas permeates your car, the odor is neutralized and any bacteria and viruses are killed. Ozone treatments are the best method for removing stubborn odors. As a gas, it can reach inside vents, far under seats, saturate upholstery fibers, and reach all the nooks and crannies that you can’t.

How does ozone work?

Ozone is the most powerful sterilant in the world. Ozone uses the chemical reaction of oxidation to break down unwanted molecules. O3 is an unstable molecule that, when it comes into contact with another molecule of any kind, will destroy it through the process of oxidation. Bacteria and viruses are destroyed when ozone comes into contact with the cell wall and breaks it down on a molecular level, effectively destroying the cell entirely.

When should I get an ozone treatment?

An ozone treatment by your detailer is done using an ozone generator. Typically, this process is done by sending specific-wavelength UV light at oxygen atoms. The generator will be placed in your vehicle for as long as necessary to remove any odor. Ozone odor removal is permanent, provided you have removed the source of the smell. Your detailer will thoroughly clean your car before the ozone treatment. It’s important to make sure that the cause of any smell is taken care of. In the case of mildew, make sure you have dealt with the source of the dampness as well.

Ozone Treatments cure smelly cars

One of the biggest causes of vehicle odors that can’t be removed is tobacco smoke. Phenol, an invisible chemical present in secondhand smoke, is responsible for irritation of the eyes and respiratory tract. An ozone treatment will completely oxidize any remaining phenol gas, effectively neutralizing the odor. In this case, the odor will not return because the molecules have been destroyed rather than masked or filtered.

Ozone is a gas which will dissipate after about half an hour after treatment, so there is no risk of exposure from your vehicle. Your detailer will be sure to sufficiently air out your vehicle before returning it to you.


Can I use an ozone treatment in my house?

It can be very tempting to purchase an ozone generator yourself for use in the home. While some ozone generators are marketed for use in the home, the EPA has not cleared them for indoor use. It’s important to note that ozone is toxic to animals, including humans. Breathing ozone can cause the same chemical reaction to happen in your body that is happening to the bacteria and viruses in your car. Symptoms include irritation of the upper respiratory tract, cough, and difficulty breathing. If you are looking for odor removal in your home, it’s best to look for natural ways to remove the odor, such as baking soda or cat litter.


Do you have a smelly car that you just can’t freshen up? Make an appointment with our detailing department today for an ozone treatment!

10 Steps to Spring Cleaning Your Car

Spring is finally on the way! We will be doing spring cleanups in our homes, our gardens, and our garages. Why not in our cars as well? Your car sees a lot of wear and tear in the winter, from brakes and tires to body and interior. It’s important to give your car a thorough cleaning once the worst of the winter is over to get all of the leftover sand and silt off.

Body & Wheels

Your car’s body takes a serious beating over the winter. In New England, we can get anything from hail to heavy wet snow to beating rain. Add that to all of the upsplash that comes from the roads and you’ve got a recipe for disaster. In Salt Eats Cars, we advise washing your car every 7-10 days over the winter in order to keep most of the sand and salt at bay. Even if you’ve kept to that rule religiously, a thorough washing is necessary to get in the cracks and crevices.

Don’t forget the buff and wax, too! A thorough exterior detail is always best after winter so that your vehicle’s paint can be evened out and shined up. Even though the sand and silt are gone, it’ll soon be time for the harsh sun of summer. It’s worth your time to purchase a wheel brush (about $10 at most stores) if you have rims on your vehicle. The thorough clean will leave your rims much cleaner than with just a wash.

  1. Wash
  2. Wax
  3. Polish Chrome
  4. Wheels

Streaks on a car - ProWash

Interior

It’s a toss up, which part of your car gets the most abuse from winter weather: the exterior or the interior. Winter boots on your carpet bring the same sand and salt from outside but without the benefit of having it easily washed off. The interior of your car can suffer similar stuffiness to your house over the winter due to the fact that the windows are always closed. Riding on the coattails of all that stuffiness is the presence of molds and mites. Check out Allergens and Your Car for extra details on getting rid of them.

  1. Vacuum
  2. Shampoo
  3. Dash
  4. Console
  5. Vents
  6. Windows

Some car wash vacuums have shampooing options. You can also use general purpose cleaner and a damp rag. **Note: make sure you rinse and dry your interior thoroughly with the heat on to avoid mildew caused by leftover dampness. An extractor machine, used by professional detailers, is your best bet for hard-to-remove soil and silt. An extractor machine also dries as it cleans, so there is very little risk of mildew.

Salt eats cars… We’re going to curb its appetite.

As has been said many times before, Salt Eats Cars. But how? And why? What can you do about it? We’re going to answer all of those questions in our article about road salt and what it means for your car.


Salt or Sand?

This is a long-standing argument, and every town has taken a different side. Each option has its own pros and cons:

SaltSand
Works above 12 degrees FOnly provides traction; doesn't affect snow and ice
Questionable environmental impactNeeds to be reapplied during snowstorms
Melts snow and ice effectivelyExcessive amounts of sand can be a problems in the spring
NaCl is mined from underground deposits

Why is salt so bad for my car?

It’s not that the salt is bad for the car; the salt and the water together are bad for your car. In layman’s terms, the presence of the salt in the water accelerates the natural process of rusting that happens when iron comes into contact with water and air. This is also why giving your car a rinse-off isn’t sufficient in the winter.

For those among you who are more science-minded, this article goes into detail.

Even though not all car bodies are made of metal, there are still many parts that are. Splash Guards under the fenders of your car keep a lot of the salt water out, but there are many exposed elements in your undercarriage. These are often the first places to rust as they are generally not protected at all. That’s why it’s a good idea to have an undercarriage treatment at a tunnel car wash every time you wash your car.

What can I do to prevent damage?

Anything that forms a barrier between saltwater and your car is a preventive measure. If you park your car on the street, invest in a car cover. At the very least, invest in a buff and wax. Buffing your car before waxing is always a good idea, as it removes most scratches, as well as dirt and grime that aren’t removed by a good wash. Having as smooth a surface as possible when you apply your wax will help it to last as long as possible and give your vehicle’s body the best protection. The wax itself will allow the salt water to run off your car quickly without the opportunity to assist in oxidization.

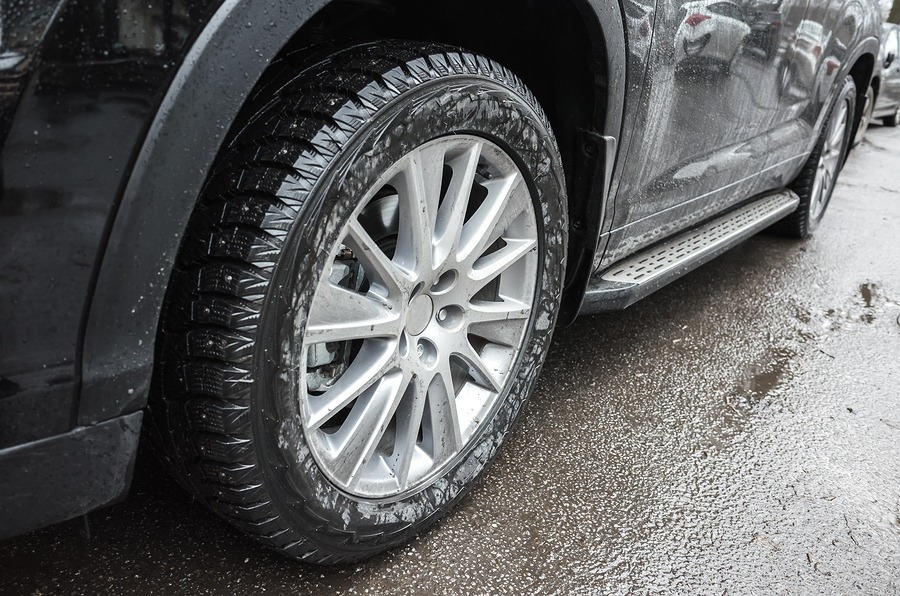
Black Car on Salty Road

Regular washing is also important, because there are metal parts of your car that aren’t covered by wax: your gas tank, your undercarriage, and your frame, to name a few. Just going to the car wash isn’t enough. Keep in mind these important tips to get the most out of your wash:

  1. Wash your vehicle at least every 10 days.
  2. Don’t wash your vehicle if it’s below 35 degrees out.
  3. Make sure you go through a tunnel wash that has a good undercarriage treatment.
  4. Don’t scrimp – get the good wash!

Remember, even though winters in New England are tough at the best of times (and they’re predicting a particularly tough one this year), it doesn’t have to be as tough on your car.


Stay Safe this Season!
 

Salt or Sand?

This is a long-standing

Allergens and Your Car: A Guide to What They Are and What To Do

“Allergies”. There may not be a word in the English language that invokes quite as much ire. We vacuum our homes with HEPA vacuums, we buy special pillows, we treat our furniture, rugs, and even our pets for allergens. And yet, we still sneeze and cough. What gives?

Your car. Yes, your car is a HUGE source of allergens and one that isn’t usually nearly as well taken care of as your home. The degree of dust, dirt, and grime that accumulates in your vehicle is absolutely staggering. It’s easy to overlook all of the little cracks and crevices in which crumbs, drips, and dust can accumulate. This is precisely where the problem lies. In this article, we’ll go through the different types of allergens, where they’re commonly found, and what you can do to get rid of them.

Dust Mites

Where are they?

These culprits can be found all over your vehicle. Dust begins with the cabin air filter, then travels through the vent system. From there, it disperses onto all of the surfaces of your vehicle: seats, floor, dashboard, you name it. Some surfaces are more prone to dust mites than others: the vents themselves, any cloth surfaces, rugs. They also tend to accumulate in crevices where there isn’t a lot of air flow; they will be blown into your car from the vents, and then fall to the floor in those hard to reach places – and stay there.

How can I get rid of them?

In many cases, a typical car wash vacuum isn’t sufficient. Those of you with allergies need to use a HEPA vacuum or a steam cleaning unit in order to get all of the dust mites out of your cloth surfaces and rugs. For the vents, you can use a slightly damp cloth to wipe them out, so as to not blow more dust mites back into the car. It’s also important to make sure that you change your cabin air filter regularly.

Mold

Where is it?

Many people eat in their cars. Everyone transports groceries in their car. Trash gets transported in your car. You may have coffee or drinks in your car. All it takes is one crumb or one drop of soda or coffee to grow mold.

The greatest offenders for mold are trunks, cupholders, and rugs. It’s easy to overlook trunk of your car; you’re not usually back there. Things can get tipped over very easily and immediate cleanup isn’t usually a priority. Clean cupholders are a constant battle, particularly for those of us with children (although we did do a recent Facebook post about using cupcake liners to make keeping those pesky pits clean). It’s notoriously difficult to get anything out of a rug without a vacuum, which most of us don’t do nearly as often as we should.

How can I get rid of it?

The only way to get rid of mold is with a steam cleaner. There are many great options available at local retailers that you can also use in your home. However, if you have a stubborn problem that you feel needs a more powerful touch, our detailers have a machine called an extractor that simultaneously steams and uses powerful, green chemicals to remove any stains and mold.

Dirty Console of Your Car

Fumes & Vapors

Where are they?

We all like our cars to smell nice. Air fresheners come in all shapes, sizes, and scents. Unfortunately, many of them contain the chemical formaldehyde, which is a known irritant. While they may mask other odors in your car, you’re essentially trading one irritant for another.

Do you smoke in your car or allow others to do so? Even if you smoke outside of your car and then get right inside, the smoke will still cling to your clothes and enter the car. Particularly if you have cloth seats, don’t allow people to smoke in your car. Aside from the smell, the chemicals from the smoke will irritate many passengers.

Unbeknownst to most people, foam padding, vinyl, and plastics release fumes into the air. While these may be in minute quantities, they can still be irritating to some.

How can I get rid of them?

The easy answer to air fresheners would, of course, be to notuse them. If you enjoy having a car that smells nice, however, you can try a Car Essential Oil Diffuser. The same answer goes for smoking: your car will smell much nicer if you smoke outside of it.

Trickier, however, are the fumes from your car’s components. The fumes eventually leave a haze on the interior of your car’s windows. Clean your car’s vinyl with a sudsy solution of two tablespoons of a mild, perfume-free dishwashing detergent and two quarts of warm water, then wipe dry with a clean, cotton cloth. Afterward, use an ammonia-free glass cleaner to clean your windows.


There is also a treatment known as ozone, O3. Ozone is the second most powerful sterilant in the world. It is highly effective in killing viruses, bacteria, and neutralizing odors. As such, it is also effective in destroying molds and dust mites. Contact us for an ozone treatment today!

Environmentally Conscious Car Care

Time is running out for those washing their cars at home! As the cold weather settles in, washing your vehicle outside becomes more of a hindrance than a pastime. For those of you that prefer to do so for the time being, here are some best practices to keep in mind:

  • Wash your car on gravel or grass. That way, any runoff can be naturally filtered before running into the groundwater.
  • Use a bucket and sponge to wash your car. This will result in less water use. When emptying your bucket, use a toilet or utility sink rather than dumping it in the street drain.
  • Use a biodegradable, phosphate-free car soap.

Drainage is always the main concern with washing your car at home. Wastewater goes directly into the groundwater system and contaminates it with any soap or chemicals that you’re working with. Even with the most environmentally friendly and biodegradable soap, you can expect an impact. There is especially cause for concern for those with groundwater wells within approximately 1000 yd.
Simoniz (r) Green Scene
Pro-Wash uses Simoniz ® Green Scene lubricating soap in our tunnel car wash. Green Scene is listed on the US Environmental Protection Agency’s Safer Choice list for Car Care products. Paired with proper drainage, Green Scene is one of the best options out there for our environment. Green Scene is also a leader in quality assurance, providing superior cleaning power with an emphasis on environmental responsibility.

As humans, we must take care of our habitat. That means being responsible when it comes to the use and disposal of chemicals and other waste products. When we use any sort of chemical outside, such as pesticide, fertilizer, or car soap, it’s important to keep in mind the impact of that chemical on the environment. Being conscious doesn’t end with what we choose to use. It continues with how we use to dispose of it as well.

Emergency! Help For Your Car’s Interior

Accidents happen; things break and get spilled (or worse). You may not be able to get a detailing appointment right away. What can you do in the meantime? For some stains, you can make a certain amount of headway on your own. Perhaps not get the entire stain out, but at least make it presentable for company or rideshare. Here’s a comprehensive guide to treating different stains.

**Always remember to test any cleaning solution on an inconspicuous part of your upholstery first to make sure it won’t ruin the fabric!**

Coffee

We’ve all done it – stopped short and gotten coffee all over ourselves. As soon as you can, dilute the stain with water and blot with a paper towel. Spray with dye-free glass cleaner. Let it sit for about 5 minutes, then blot again with a paper towel.

Scrubbing Your Car's Seat

Ink

Those of us with Little Artists know the struggle with having markers in the backseat. Mix rubbing alcohol with a little water and rub with careful, light pressure. Use a cotton cloth. If alcohol doesn’t work, others have found success with vinegar or hairspray.

Greasy Stains

Use paint thinner for greasy stains, like food or lipstick. Add water to a cup of paint thinner until you have a 1:1 ratio. Dip the cotton cloth into the solution and rub it into the stain. When you’re done, be sure to use some salt or cornmeal on the area to soak up the thinner overnight. You can vacuum it off in the morning.

Vomit

It’s important to clean this one up AS SOON AS POSSIBLE! As soon as the excess vomit is cleaned up, use cold water to dilute the stain. As it is organic, mild soap and warm water are appropriate for this kind of stain. You can finish off by blotting with a little club soda to neutralize any leftover acid. If you have a problem with smell, try cleaning a second time with a paste of baking soda and water.

Keep in mind that some stains can be extremely stubborn and just refuse to come out, no matter how many times you attack them. At this point, an appointment for an interior detail may be appropriate. Detailers have a machine called an extractor, which uses high-pressure steam and vacuum technology to get heavy soil out of upholstery and carpet. Don’t fret – if you can’t get it, they can.

Why You Should Have a Professional Buff Your Car

Nothing says that you care for your car like an exterior so shiny you can see yourself in it. Your car’s clear coat is important to this mirror-like appearance. How do you get your exterior to look like this? First of all, it’s the work of a professional to get that true glossy appearance. Referring back to our earlier post talking about the anatomy of your car’s paint, you know that the clear coat is the topmost coat on your car’s exterior.

Buffing is the process of using an abrasive action, accomplished by using a polish and a buffer with different kinds of pads, depending on what the detailer feels the car needs. There are many different kinds of pads; they fall mainly into two categories: foam and wool. The fine abrasives in the polish work with the pressure and speed of the buffer to even out your car’s clear coat. This allows for an even reflection of light, giving that glass effect.

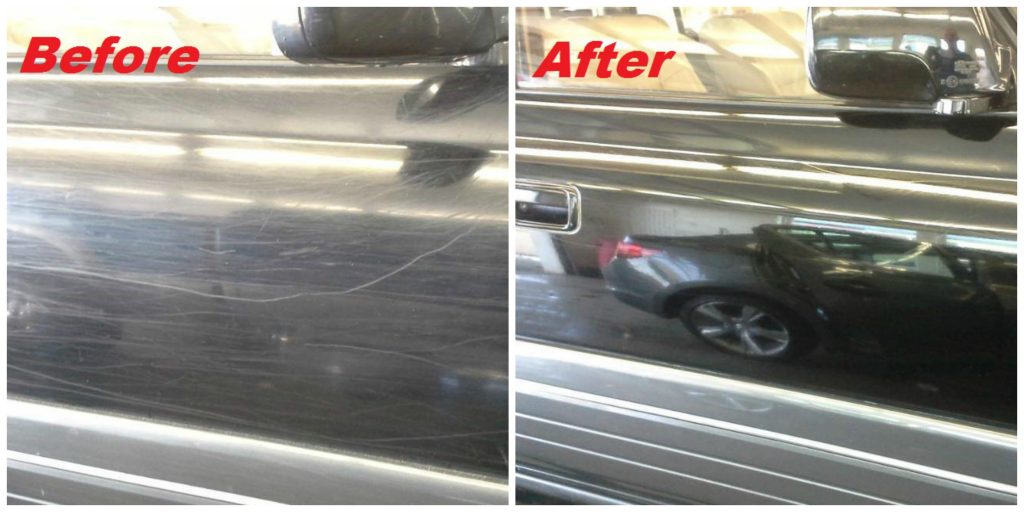
Professional Buff Removal of Scratches

Professional Buff Removal of Scratches

It’s very easy to cause serious damage to your car’s clear coat – and even the underlying paint – if you aren’t an experienced detailer. Using the wrong pad or polish can take off too much clear coat, leaving a highly noticeable hole in the clear coat. Over time, the hole will expand and the paint beneath will oxidize. An inexperienced DIYer can create swirl marks, which we also mentioned in our last post. These are caused by using the wrong abrasiveness or having even microscopic debris in the buffer pad.

Your best bet is to have an experienced detailer buff the exterior of your car. The professionals here at Pro Wash are more than happy to give your car that lustrous finish you’re looking for. Call today for an appointment!

Scratches and Your Car’s Paint: What You Need to Know

Your car’s paint job is one of the first things that people notice when you drive down the street. Is it shiny? Is it lustrous? A paint job rife with scratches and swirl marks doesn’t shine like it’s supposed to. What are all of these little scratches and circular marks? Where did they come from? First, let’s understand the anatomy of your paint job.

paint

Your car’s paint is put on in 3 parts: first is the primer, which is put on to help paint stick to body pieces and cover up any imperfections in body pieces (if you’ve had any bodywork done from accidents or otherwise). The next step is the paint itself. Depending on where you bought your car or where you got your work done, this will be at least 2 coats. All of this will be sealed with the clear coat– a polymer with similar properties as your paint, but only lacking pigment.

So what about those scratches? There are varying levels of scratches. We’re going to cover three today. The first level only goes as deep as the clear coat; these are fine scratches, usually seen as imperfections in the paint. These are caused by overuse of automatic car washes, using a dirty towel or mitt to wash your car, and neglect of your car’s exterior.

We’re also going to touch on special level 1 scratches called swirl marks. These imperfections in your paint are caused by a buff job done by a dirty or inappropriate buff pad. A buffer works with a polish to remove a tiny bit of clear coat to remove the scratch(es). A good polish job will leave your paint shiny as a mirror. (We’ll be covering swirl marks more in depth in a later blog post, so stay tuned!)

A Level 2 scratch goes down into your paint. It is a noticeable scratch but doesn’t appear to be a different color than the paint of your car. While some of the scratch can be taken out with buffing and polishing, the scratch will still be there.

A Level 3 scratch goes all the way down to the primer. This scratch is very noticeable and is not fixable without filler. Be careful to get this scratch taken care of as soon as possible, as uncoated paint can break down and your body will be exposed to the elements. This can lead to rust and weather exposure.

Remember – buffing is NOT a DIY job! It is something best handled by a professional. Swirl marks are never attractive for your paint. Contact our detailers at ProWash for an external detail.

Scroll to top